Bringing Science Into Your Holiday Cooking
Published November 29, 2023
Series Mentioned in this Post: The Science of Cooking
The holiday season is a joyful time of year to be surrounded by friends, family, and loved ones celebrating our own traditions and the end of the calendar year. When thinking of this time, many of us think of the unique flavors and scents of the dishes served up during these special occasions.
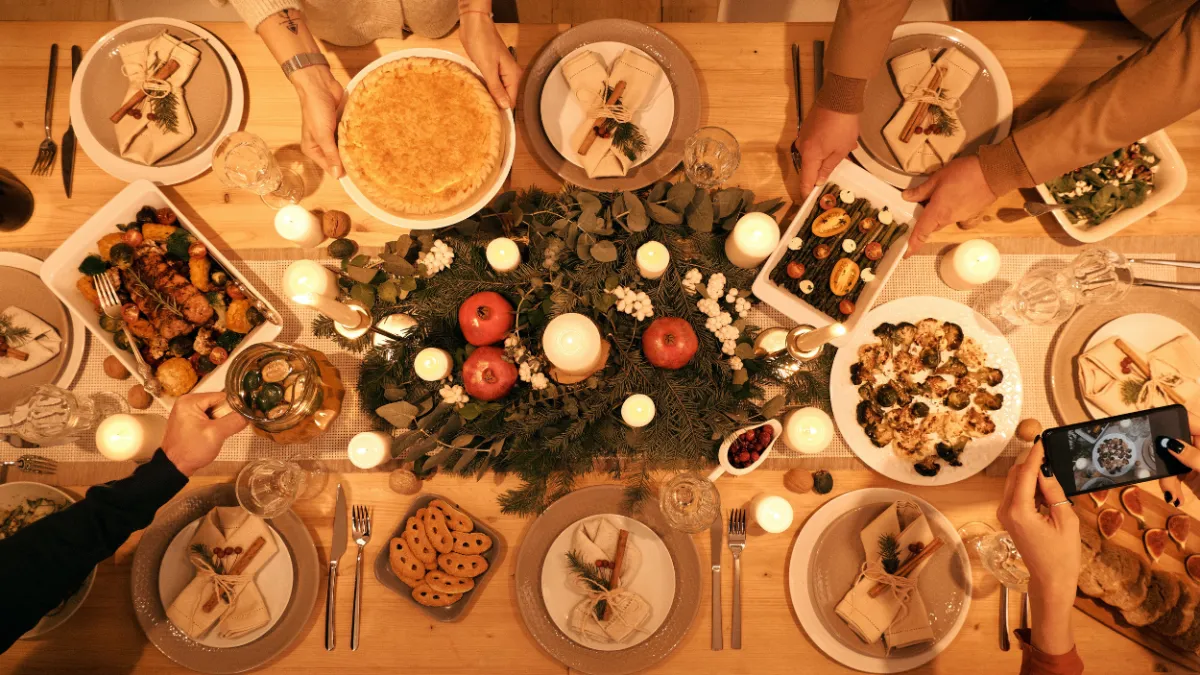
Whether you’re frying up latkes for Hanukkah, stewing up gumbo for Kwanzaa, baking the perfect Christmas ham, or something unique to your cultural traditions, you might not realize how much science there is involved. Our virtual on-demand courses in The Science of Cooking delve into the scientific processes happening in kitchens worldwide.
While the courses are led by Harvard professors in mathematics, physics, and sciences, you don’t need to be a scientist yourself to get familiar with how basic concepts can impact your final dish. By understanding the science behind your cuisine, you can expand your knowledge as a chef and strengthen your confidence in crafting your own original recipes.
For this holiday season, we turned to recipes from our three Science of Cooking courses covering physics, chemistry, and microbiology. These recipes include: Ceviche, Ice Cream, Molten Chocolate Cake, and No-Knead Bread.
Each one of these recipes is featured in one of the courses and includes a little science lesson behind the culinary magic. Try out one of these dishes this December and share it with us on social media at @HarvardOnline!
Molten Chocolate Cake
From: Science & Cooking: From Haute Cuisine to Soft Matter Science (Chemistry)
Ingredients:
- 4 oz (120 g) dark chocolate chips
- 8 Tbsp (107 g) oil or butter
- 4 oz (120 g) sugar
- 5 large eggs (275 g)
- 2 oz (60 g) flour
- a pinch (0.5 g) salt
Materials:
- 1 pot + metal bowl or 1 microwave-safe bowl
- 1 medium bowl (wet ingredients)
- 1 small bowl (dry ingredients)
- 1 scale
- 1 fork or whisk
Procedure:
1. Melt chocolate chips and oil/butter.
2. Microwave method: measure out chocolate chips and oil/butter into microwave safe bowl. Microwave on high 1min, mix the chocolate and oil until uniform, and then set aside to cool a bit.
3. Stove method #1: place chocolate and oil/butter in a small pot and heat on low, while stirring, until it melts. Stove method #2: fill another pot with some water and bring to a boil, then place chocolate and oil/butter in a metal bowl over the pot. Stir chocolate as it melts.
4. Mix sugar and eggs together well in medium bowl, then slowly add in chocolate mixture.
5. Weigh out flour and salt into small bowl, then mix it into the wet ingredients.
6. Pour into ramekins or baking pan and bake at 350ºF.
Want to make it a science experiment? Try adding the ramekins to a pan with a water bath on a stove and steaming for 7-18 mins.
Ceviche
From: Science & Cooking: From Haute Cuisine to Soft Matter Science (Chemistry)
Note: This fish is sashimi-grade, and therefore is relatively safe to consume. The consumption of raw or undercooked eggs, meat, poultry, seafood or shellfish may increase your risk of food borne illness.
Ingredients:
- ½ pound (225 g) sashimi-grade fish or shrimp
- 1¼ cup (300 ml) lime juice
- ½ cup (120 ml) diced tomatoes
- ¼ cup (60 ml) diced red onion
- ¼ cup (60 ml) roughly chopped cilantro
- Salt to taste
- ½ avocado, peeled, seed removed, sliced
- tortilla chips
Materials:
- 1 bowl
- 1 knife
Procedure:
1. If using fish, cut into ½-inch (1 cm) cubes. If using shrimp, make sure the shrimp are peeled.
2. Set aside 6 pieces for the experiment and save the rest for a delicious reward once you are done.
3. Place the lime juice in a bowl. Place the rest of the fish/shrimp in the lime juice for 20 minutes.
4. After 20 minutes, drain the juice from the fish, then mix all of the ingredients except for the avocado with the fish.
5. Garnish servings with avocado slices and eat with tortilla chips.
Food Safety Tip: The lime juice inhibits the growing capacity of many pathogen microorganisms in the foods, but not of all of them, so there is some risk of food-borne illness when eating non-heat-treated fish. It is also very common to find in fish a parasite called Anisakis, which can withstand the action of acid solutions during periods of even months. To avoid any risk, the fish should be frozen before preparing the ceviche or after the ceviche is done but before eating it, at a temperature of -18ºC for 72 hours.
Want to make it a science experiment? While cooking the recipe below, try taking out a small piece of fish every few minutes, and watch how the diffusion of lemon juice (H+ ions) into the fish flesh causes a change in the texture, and sometimes color, of the flesh. Since fish is mostly made of water, by measuring the thickness of the cooked layer, you can calculate the diffusion coefficient of H+ ions in water.
Ice Cream
Using the altered phase transition of water
From: Science & Cooking: From Haute Cuisine to Soft Matter Science (Physics)
Ingredients:
- 90 g heavy cream**
- 100 g whole milk**
- 20 g sugar
- ¼ tsp vanilla extract (or other flavoring of your choice)
- 600 g ice
- 200 g salt
**This procedure also works with other milks - soy, almond, rice, etc for a non-dairy version. Just replace the cream and milk with your preferred non-dairy alternative.
Materials:
- 2 large Ziploc bags, or other plastic bag of ~ 1 gallon/4 L volume. Bags must be able to seal completely. You can also use a large plastic container with a snap-on lid.
- 1 small Ziploc bag, or other plastic bag of ~ 500 mL volume. Bag must be able to seal completely.
- 1 scale (optional)
- 1 oven mitt or towel
- 1 plastic cup
- measuring/weighing cups
- spoons (for tasting)
Procedure:
1. Fill a large Ziploc bag or plastic container with the ice (use 600 g of ice, or about 1/3 full). Add the salt to the bag/container.
2. In a separate small zip-lock bag, add the heavy cream, milk, sugar, and vanilla extract (or other flavor). Seal the bag, pressing out as much air as possible to maximize contact between the liquid in the bag and the ice outside it, and seal well.
3. Place the small bag with the ice cream ingredients inside the large bag containing the ice and salt. Place the entire package into a second large bag to prevent leaking.
4. Alternatively, place the small bag with the ice cream ingredients into the plastic container with the ice and salt, and seal the lid.
5. Massage or gently shake the bag or container until the ice cream becomes solid. You can use oven mitts or hand towels to hold the bag or container, so your hands don’t get cold - this will let you "massage" the ice cream better. Constant mixing is key to getting a good texture!
6. Remove the small bag with ice cream from the large bag or container with the ice. Wipe off the top of the small bag and then open it carefully. Test the consistency with a spoon - if it seems solid and delicious, you’re done! If your ice cream isn’t solid enough before the ice melts, add more ice and salt and repeat step 4 until it’s ready.
7. Spoon into cups and serve.
Want to make it into a science experiment? Once the ice cream is done, measure and record the temperature of the ice cream, and the temperature of the salty ice water in the bag. How do they compare? Why do you think this is?
No-Knead Bread
Adapted from a recipe developed by J. Kenji López-Alt. First published in the New York Times.
From Food Fermentation: The Science of Cooking with Microbes
Ingredients:
- 400 g bread flour (approx. 2 ⅔ cups) or all-purpose flour (if you would like to avoid gluten, buckwheat flour will also work)
- 1.25-2 tsp salt (7.5-10 g) – You can use slightly more or less salt, based on your preference
- ½ tsp. instant yeast (instant or dry yeast)
- 280 g warm water (approx. 1 cup plus 3 Tbsp.) – If you use all-purpose flour, reduce water by 20 g or 4 tsp.
- ⅛ tsp. white vinegar or lemon juice
Materials:
- 1 large mixing bowl
- 2 spoons
- 1 medium-sized Ziplock bag
- 1 ruler
- 2 index cards (or other sturdy paper)
Procedure:
1. In a large bowl, combine flour, yeast and salt.
2. In a separate bowl, combine water and vinegar or lemon juice
3. Add the liquid to the dry ingredients and stir until blended; dough will be shaggy and sticky.
4. Put the dough in a Ziplock bag, press on the bag to remove any air, and seal the bag. Take a photo of the dough.
5. Lay the bag flat on a horizontal surface. Place an index card on top of the bag, parallel to the table. Hold the ruler perpendicular to the table and record where the paper intersects the ruler.
6. Let the dough rest in the sealed bag at room temperature ~21˚C (70˚F), for at least 12 hours.
7. To bake the bread, see the complete recipe here. One of the keys to making this no-knead bread recipe so delicious - crusty on the outside with a soft and fluffy middle - is cooking it in a pre-heated dutch oven. If you do not have a dutch oven, cook it in another pot with a lid and read this short article about why this step is so critical to developing the bread's texture. (A good way to tell when the bread is done baking is when it sounds hollow after knocking on it.)
Want to make it a science experiment? Try using different types of flour (whole wheat, rye) and/or yeast volumes to compare the dough’s fermentation rates and bread textures. You can also change the water content and leavening temperature. Keep in mind that whole wheat and rye flour absorb more water than white flour, so you will likely need to add some extra water to prevent the dough from drying out.
Remember to share your creation with us on social media by tagging @HarvardOnline! If you’d like to learn more about The Science of Cooking, check out the course series page here.
Related ArticlesHarvard Online's Most Fun Courses Image

The Art and Science of Barbecue Image
|